How to Solve ‘NVIDIA Installer Cannot Continue’ Error on Windows 10

Top 7 Best Free Awesome Duplicate Photo Finder Alternatives
26 noviembre, 2021
Fix Touchpad Scroll Not Working on Windows 10
26 noviembre, 2021How to Solve ‘NVIDIA Installer Cannot Continue’ Error on Windows 10
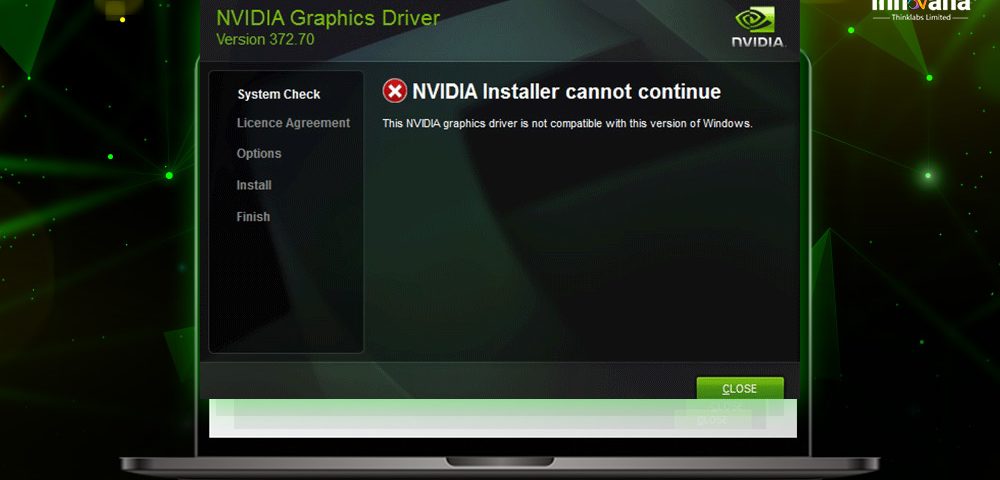
NVIDIA offers are one of the most robust graphics card and hardware. Hence, no doubt why most of the gaming professionals, designers, and developers have NVIDIA GeForce graphics card installed on their PC. However, while installing it, some of them have faced ‘NVIDIA installer cannot continue’ error. And it is essential to resolve the NVIDIA installer failing issue. It can stop you from installing the driver for your graphics card.
There are multiple reasons for NVIDIA Update Core failed issue, or we can say installer failure error. Therefore, to solve this problem, you also need to try several solutions. Here in this post, we are going to provide some handy and useful methods to resolve the NVIDIA installer cannot continue Windows 10 issue.
Methods to Resolve NVIDIA Installer Cannot Continue Issue
Below are all the tested ways to resolve the NVIDIA installer cannot continue error on Windows PCs along with their easy instructions.
Temporarily Disable Anti-Malware Program
All of us know that antivirus protects our PCs from malware threats. For this, it scans your disks, files, downloads, and even the app that you try to install. But sometimes, due to the weak database, some antimalware even mark helpful apps like GeForce Experience as a threat. And ultimately cause NVIDIA GeForce Experience installer failed issue.
Hence, you have to disable your antimalware. The disabling steps depends on the antivirus you use. So, check the setup settings of your security program and deactivate it.
Read More: How to Download NVIDIA Graphics Driver on Windows 10
Rename NVIDIA Graphics Card Folder in Program Files
It is an easy fix to resolve the NVIDIA installer cannot continue error. You only have to change the name of the NVIDIA graphics card folder. However, it is not that helpful, but some people claim that it worked for them, and it is quite easy, so you can give it a try. Here are the required steps.
1. Go to Disk C: or the disk in which you have installed the Windows.
2. Find the Program Files folder and open it.
3. Look for the NVIDIA folder and right-click on it.
4. Select the Rename option.
5. Enter the name you want.
6. Try again to install the NVIDIA graphics card or its utilities and check if it shows any issues like ‘NVIDIA telemetry client failed to install.’
End All NVIDIA Processes
Here comes another simple method to solve NVIDIA installer failing errors. Some people claim that after ending all the running NVIDIA processes, they overcome installation failure issues. Hence, we have mentioned it in this post. Here are the instructions that you have to follow to end all running NVIDIA processes.
1. Right-click the Start icon and select Task Manager.
2. Click the Processes tab and search NVIDIA.
3. Make a click on all of them and then select End Task option, respectively.
4. Retry the installation to check if it is still showing NVIDIA GeForce Experience installer failed or not.
Read More: How to Fix “NVidia Graphics Driver Is Not Compatible With This Version of Windows”
Enable Graphics Card
It is also possible that your NVIDIA Graphics Card is currently disabled, and hence you are facing NVIDIA installer cannot continue issues on Windows 10 PC. So, try to check if your graphics card is enabled or not. If it is not, then activate it. Here are the required instructions.
1. Go to the Device Manager. If you are not aware of the shortcuts to open it, then you can also use the Windows search box.
2. Expand the Display adapters by clicking on the arrow.
3. Select the NVIDIA graphics card and right-click on it.
4. In the context menu, check if it is showing enable or disable option. If it shows an Enable option, then you have to select it.
5. Close all the windows and reboot the computer.
Now install the NVIDIA Graphics Card and observe if it still shows ‘NVIDIA update core failed’ or any other such errors.
Update and Install NVIDIA Graphics Driver
You might know that most of the Windows PCs issues are related to the faulty drivers. Hence, repairing them is one of the best solutions that you can try to resolve several errors. NVIDIA installer failing issue is also one of the problems related to broken, outdated, or missing graphics card drivers. So, to resolve it, you can try updating your NVIDIA graphics drivers.
It depends on you whether you want to update your graphics drivers manually or automatically. We have mentioned both the methods below.
How to update Nvidia Graphics Driver Manually
Here are the steps that you can use to update your Nvidia graphics driver manually using the Windows Device Manager.
1. Open the Device Manager window. You can use the search box as described above as well.
2. Now look for Display adapters.
3. Expand it by clicking the arrow icon.
4. Right-click the NVIDIA graphics card.
5. Click Update driver software to update the NVIDIA graphics card driver.
6. Go for ‘Search automatically for updated driver software.’
7. Wait and let the Windows finish the NVIDIA graphics card driver update.
Once the update gets complete, restart your system and try installing the NVIDIA graphics card again. Check if Windows is still showing NVIDIA telemetry client failed to install or any other such error.
How to Update Nvidia Graphics Driver Automatically
Here comes the method that we recommend the most to update your graphics driver or any other PC driver. If you are not interested in performing several steps and investing much of your time only to update a device driver, then we suggest you to use Bit Driver Updater for it. As per our opinion and experience, this is the best way to repair and update outdated and faulty device drivers.
The software also allows you to perform driver update for all the device drivers in one click. You can even backup and restore the current version of your NVIDIA or any other PC driver. It provides all these advanced features for just a few bucks.
However, you can also try it for free as the software is free to download.
Once you download and install the Bit Driver Updater application on your PC, you can follow these steps to update the NVIDIA graphics driver.
- Open Bit Driver Updater.
- On the home screen, select Scan Drivers.
- After the completion of the driver scan, select the NVIDIA graphics driver from the list and click Update Now.
That’s it. Now let the software complete the NVIDIA driver update. Once it gets finished, reboot your PC and check if it still shows ‘NVIDIA installer cannot continue on Windows 10,’ when you try to install the NVIDIA graphics card.
‘NVIDIA Installer Cannot Continue’ Error: Fixed
‘NVIDIA installer cannot continue’ is one of the most common errors that NVIDIA users face while installing the graphics card. But do not worry, you can easily resolve it with the helpful method that we have mentioned above. However, if you know some other solution that helped you to fix the NVIDIA installer failing issue, then make us aware of that as well.
Furthermore, if you found this post informative and helpful, then you can show your support by subscribing to Innovana blogs.
