[Fixed] WMI Provider Host High CPU Usage on Windows 10

How to Download & Update Ricoh Printer’s Drivers
12 diciembre, 2021
How to Download Logitech G29 Driver for Windows 10/8/7
12 diciembre, 2021[Fixed] WMI Provider Host High CPU Usage on Windows 10
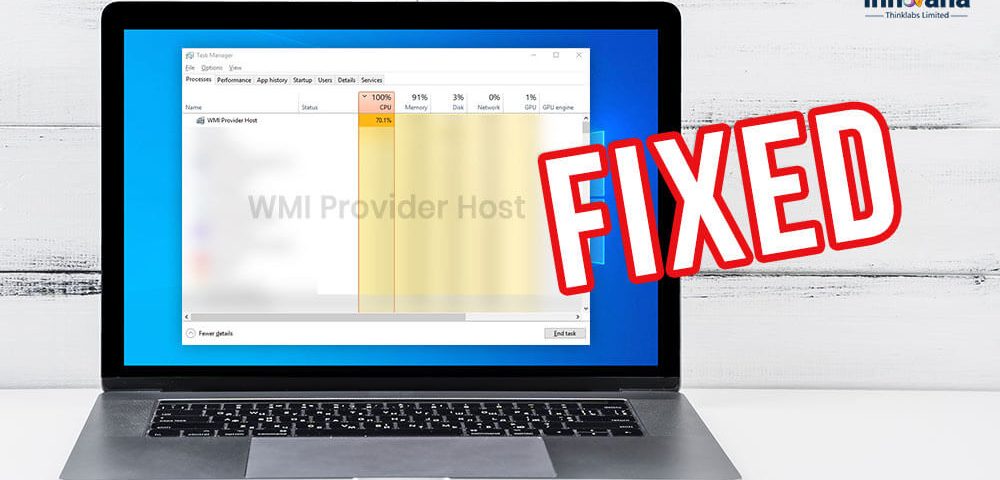
High CPU usage on Windows 10 occurs when your computers fail to assign memory to new tasks. And high CPU usage by WMI Provider Host results in slow and buggy PC performance. But you do not have to worry about it as this article shares some quick and easy solutions to this problem.
Without taking much of your time, let’s walk you through the fixes you need to get rid of WMI Provider Host high CPU usage on Windows 10.
Fixes for WMI Provider Host high CPU usage on Windows 10
Below is how to get rid of the WMI Provider Host high CPU usage problem quickly and easily.
Fix 1: Perform a Virus Scan:
In some cases, it is a virus that causes issues with the WMI Provider Host. Therefore, to fix the problem, you need to run a virus scan and ensure that the computer is not infected. If you find any harmful application, then uninstall it.
Fix 2: Start Windows Management Instrumentation (WMI Provider Host) service again:
Restarting the WmiPrvSE.exe service can also fix the high CPU usage issue. Follow these steps to do it.
Step 1: Call up the Run box by pressing Windows+R keys in unison.
Step 2: Type services.msc in the box that appears and click on OK.
Step 3: Find the Windows Management Instrumentation Service and right-click on it.
Step 4: Choose Restart from the context menu.
Read More: Best CPU Benchmark Software For Windows
Fix 3: Change the WMI Service Settings to Demand
Some applications unnecessarily use this service, causing the CPU usage to rise up. Therefore, setting the service to demand can also fix the problem. You can follow the steps shared below to do it.
Step 1: Use the Windows+X keyboard shortcut to bring up the Quick Access menu.
Step 2: Select Command Prompt(Admin) from the on-screen menu.
Step 3: After the elevated Command Prompt appears, input the sc config Wmi start= demand command.
Step 4: After executing the command, restart your computer.
Read More: How to Fix Bootrec/Fixboot Access is Denied Error in Windows 10
Fix 4: Boot the PC into Safe Mode
The safe mode helps you identify and quarantine the applications causing this problem. Thus, boot the computer in safe mode by following the below steps.
Step 1: Launch the Run box and input msconfig in it.
Step 2: Click on OK to open System Configuration settings.
Step 3: Navigate to the Boot tab, mark the Safe boot box, choose Network, click on Apply and OK.
Step 4: After saving files and data, click on Restart to go into the Safe Mode.
Step 5: Now, open the Quick Access menu by pressing the Windows and X keys.
Step 6: Select Windows PowerShell (Admin) from the menu that appears.
Step 7: Type the msdt.exe -id MaintenanceDiagnostic command and hit Enter.
Step 8: Click on Next to run the troubleshooting.
Step 9: Follow the on-screen instructions to fix the issues detected after troubleshooting.
Step 10: Go to the PowerShell window, enter the msdt.exe /id PerformanceDiagnostic command, and hit Enter.
Step 11: Click Next to run performance troubleshooting.
Step 12: Perform the actions suggested by your computer.
Step 13: Perform Step no.1 and 2 again.
Step 14: Uncheck the Safe Mode box, click on Apply, and OK.
Step 15: Restart your PC.
Fix 5: Restart the Services Associated with WMI Provider Host
To fix the WMI Provider Host CPU usage issue, you often need to start the services associated with it again. Here are the steps to do it.
Step 1: Press Windows and X keys at once and select Command Prompt (Admin) from the menu that appears.
Step 2: Input the following commands in the Command Prompt window one after the other and press Enter after typing each command.
net stop iphlpsvc

net stop wscsvc

net stop Winmgmt

net start Winmgmt

net start wscsvc

net start iphlpsvc
Step 3: After the execution of the above commands, restart the computer.
Read More: SOLVED: Driver Power State Failure on Windows 10
Fix 6: Uninstall the Faulty Components
One of the prominent reasons why CPU usage by this service rises abnormally is problematic components. Uninstall them by following the steps shared below.
Step 1: Open the Quick Access menu ( use the Windows+X keyboard shortcut).
Step 2: Choose Event Viewer from the available options.
Step 3: Hover the mouse on the View tab and choose the Show Analytic and Debug Logs option.
Step 4: Follow the path Applications and Service Logs > Microsoft > Windows > WMI Activity > Operational log on the left side of the window.
Step 5: Note the items appearing as Error.
Step 6: Launch the Quick Access menu and choose Task Manager from it.
Step 7: Navigate to the Details tab. Locate the process that matches the IDs noted in the previous step in the PID section.
Step 8: Now, it is up to you whether you want to uninstall the problematic program or disable its service.
WMI Provider Host is not an easy-to-understand service, and understanding it becomes even more difficult when its CPU usage is causing problems. Therefore, even after going through the above solutions, if you have any questions, then you can go through the next section to find the answers.
Frequently Asked Questions
Q1. What is WMI Provider Host used for
To put it simply, WMI is an abbreviation of Windows Management Instrumentation. Without this service, applications on your computer cannot run, and you cannot use many PC features. Below are its top uses.
- It gives various software administrative scripts the needed information about your computer.
- WMI supports tasks like configuring security settings, making changes in the system properties, etc.
- Using this service, you can find information about your PC that may otherwise not be available.
Q2. Why does WMI Provider Host take up so much CPU?
Below the prominent reasons for which WMI Provider Host may consume more resources.
- Some processes are requesting a lot of information from the WMI Provider Host.
- There is a problematic process in your system.
Q3. How do I fix WmiPrvSE.exe high CPU?
In this article, we have shared multiple solutions to the WmiPrvSE.exe.CPU utilization issue. You can apply them to get rid of this problem.
Q4. Can I kill WMI Provider Host?
It is not possible to kill or permanently disable this service as almost all applications depend on it to run. However, you can bring this service to a temporary stop by following these steps.
- Launch the Run box.
- Input services.msc and click OK.
- Locate and double click on Windows Management Instrumentation Provider Service.
- Click on the Stop option.
- Click on Yes to Stop Other Services.
- Exit the WMI Provider Host and Services window.
WMI Provider Host High CPU Usage Fixed Successfully
Through this article, we helped you fix the issue of high CPU or memory usage by the WMI Provider Host. Hopefully, the problem is not troubling you any longer. We will be back soon with solutions to another tech problem. Meanwhile, you can explore other articles and how-to guides on our blog.
