Prevent Accidental File Deletion Using CMD to Create Undeletable Folder in Windows 10

How to Download, Install, and Update KYOCERA Printer Drivers
23 noviembre, 2021
Best Free Typing Software For Windows 10, 8, 7 PC
24 noviembre, 2021Prevent Accidental File Deletion Using CMD to Create Undeletable Folder in Windows 10

This post talks about the ways to make files undeletable via CMD.
“Delete” is the widely popular and uncomplicated Windows command. Anyone, even the non-techie kids can use it effortlessly. It is so painless to use that sometimes people even end up deleting the crucial files and folders unintentionally. Thus, like many others, do you also fear the accidental deletion of essential files on Windows 10? If yes, then you can save yourself from such a situation by using CMD to create an undeletable folder in Windows 10.
For those who are uninitiated, CMD is an in-built command-line interpreter for Windows 10 for running various Windows commands.
Now, that you know creating undeletable folders via CMD prevents accidental file deletion, let’s walk you through how to do it.
How to prevent accidental file deletion by using CMD to create an undeletable folder in Windows 10?
Below are the simple steps that you need to prevent files from deleting by using CMD to create an undeletable folder in Windows 10.
Step 1: Type “cmd” in the search box and select the topmost result.
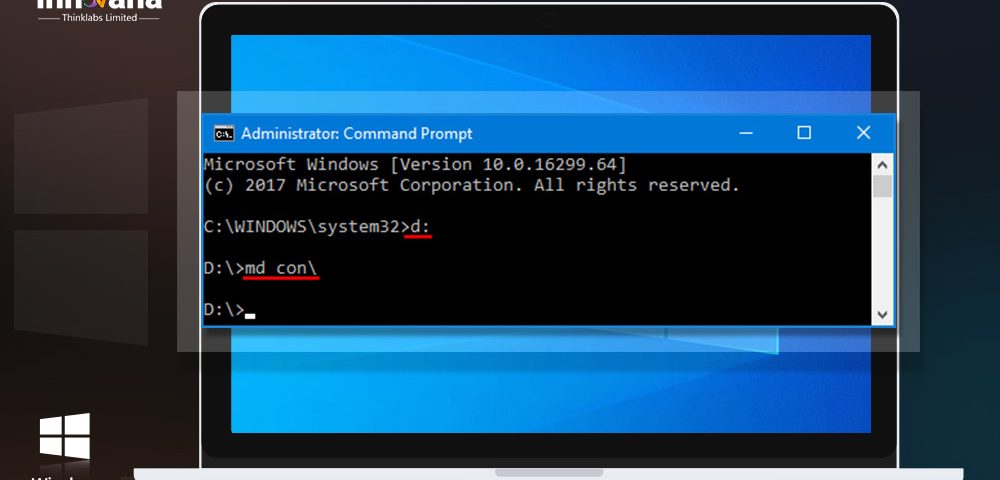
Step 2: Type a drive except for C to convert the directory to a non-root directory. And, press the Enter key.
Step 3: After changing the directory, type md con/ and press the Enter key. “.con” is a reserved name and no one can delete such folders without using Command Prompt.
Step 4: Now, go to the drive that you have entered in the 1st step. There you find a folder named con.
Step 5: Click on the folder and try deleting it, you’ll notice that even after multiple attempts it remains undeleted.
Above was how to prevent accidental deletion by using CMD to create an undeletable folder in Windows 10. If it looks too technical or doesn’t work for you due to some reason, then we have a way out. You can also alter the properties of a specific folder to stop others from accessing it. Below is how to do it.
Also Read: Best Disk Management Software for Windows 10, 8, 7
How to alter the security permissions and make a folder inaccessible?
Here is how you can modify the permissions and prevent others from accidentally deleting your files without using CMD to create an undeletable folder in Windows 10.
Step 1: Right-click on the folder for which you want to alter the security permissions and select Properties from the menu that appears.
Step 2: On the next screen, go to the Security tab.
Step 3: After the Security scan comes up, click on Edit.
Step 4: Now, click on “Add” to add a username or group.
Step 5: Now, a dialog box asks you to “Enter the object name to select”, choose “Everyone” and click on OK.
Step 6: The wizard now takes you back to the Security tab and asks “Permission for Everyone” click on Deny.
Step 7: When asked for “Full Control” click on OK.
After completing the above steps, click on OK and then choose Apply.
Now, here comes a bonus for our readers. Even after all the precautions, the possibility of accidental deletion of files cannot be ruled out. Thus, below is how to recover the files if they get deleted despite the best efforts to prevent the accidental deletion.
Recovering the accidentally deleted files in Windows 10
Here are the steps to recover the files if they get deleted accidentally.
Step 1: Type Control Panel in the search box and select the topmost result.
Step 2: Once the Control Panel opens, choose System and Security.
Step 3: Choose “Backup and Restore (Windows 7)”.
Step 4: Select “Browse for files”/ “Browse for folders” to open previously created backups.
Step 5: Now, choose the location where you want to save the files after they get restored.
Lastly, wait for the restoration of files to complete.
In this post, we discussed how to prevent accidental file deletion using CMD to create an undeletable folder in Windows 10. We also talked about how to recover the files if they get deleted accidentally. We hope that this post helped you. If you face any difficulties while performing any of the steps listed in this post, then feel free to let us know via comments. Lastly, before leaving, subscribe to Innovana Blog for more such tech solutions and updates.

